AR# 57260
|Xilinx HSSIO Solution Center - Design Assistant Transceiver Design Implementation
描述
Once the transceivers wizard has generated IP based on user-specified design requirements, an example design should then be generated, tested, and incorporated into a user's overall design. This answer record provides an overview of the example design generation process in the ISE and Vivado design tools. The latest wizard user guide contains more detailed information on each selection in the wizard. For the 7 series FPGA transceivers wizard, see the LogiCORE IP 7 Series FPGAs Transceivers Wizard v2.6 (UG769):
http://www.xilinx.com/support/documentation/ip_documentation/gtwizard/v2_6/ug769_gtwizard.pdf
Following are the key properties of the wizard-generated example design produced through this process:
- The example design is fully implementable which includes HDL sources, UCF (or XDC) constraints, and ChipScope netlists for VIO, ICON, and ILA cores.
- The HDL sources consist of GT wrappers and some example user logic (e.g., user clock generator, reset sequence controller, and data frame generator and checker).
- The example design can be used as a good start-up design for understanding how to use GT transceivers in a design.
- Care should be taken when integrating an example design into an overall system design to keep it intact as much as possible. This will allow for easier updates to new code releases and is especially critical for new silicon releases.
- It can be used as an example in all FPGA design stages, including simulation, synthesis, implementation, and hardware test.
Note: This answer record is part of the Xilinx HSSIO Solution Center (Xilinx Answer 37181). The Xilinx HSSIO Solution Center is available to address all questions related to HSSIO. Whether you are starting a new design or troubleshooting a problem, use the HSSIO Solution Center to guide you to the right information.
解决方案
Generating a design:
1) Follow the steps below to implement the example design in command line mode for the ISE flow:
a) Set up the environment variables
- You need to add the executable folder to the PATH variable
- For example, if you install ISE with default directory settings on Windows 64bit OS, you will add the following path to PATH variable:
- C:\Xilinx\14.2\ISE_DS\ISE\bin\nt64
- The executable folder has commonly already been added to the PATH variable in Linux OS.
b) Add LOC constraints for all ports
- You need to open the <core name>_top.ucf file in the example_design folder and to add LOC constraints for all input and output ports defined in <core name>_top.v.
- The LOC of reference clock differential pairs should already be added. The LOC of TXP, TXN and RXP, RXN is not required because the GT transceivers location is already defined.
- You only need to add the LOC for the remaining ports.
c) Run the scripts generated by wizard
- Open a DOC prompt or Linux terminal.
- cd to the ../implement folder
- Run 'implement.bat' on Windows or './implement.sh' on Linux.
- The .bit file as well as implementation results are now in the 'results' folder.
2) Follow the steps below to implement the example design in ISE GUI:
a) Open the ISE GUI tool.
b) Open the .xise file generated by the GT Wizard.
c) Open the <core name>_exdes.ucf file and add LOC and IOSTANDARD constraints for all IOs defined in the <core name>_exdes.v file.
d) Double click on "Generate Programming File" in the "Processes" window.
3) Follow the steps below to implement the example design in command line mode for the Vivado flow:
a) Set up the environment variables in the same way as the ISE command line flow mentioned above.
b) Add LOC and IOSTANDARD constraints to the .xdc file for all ports defined in the top level of the example design.
c) Run the scripts generated by the GT Wizard.
4) Follow the steps below to implement the example design in the Vivado GUI:
a) Create a new project with the Vivado New Project Wizard:
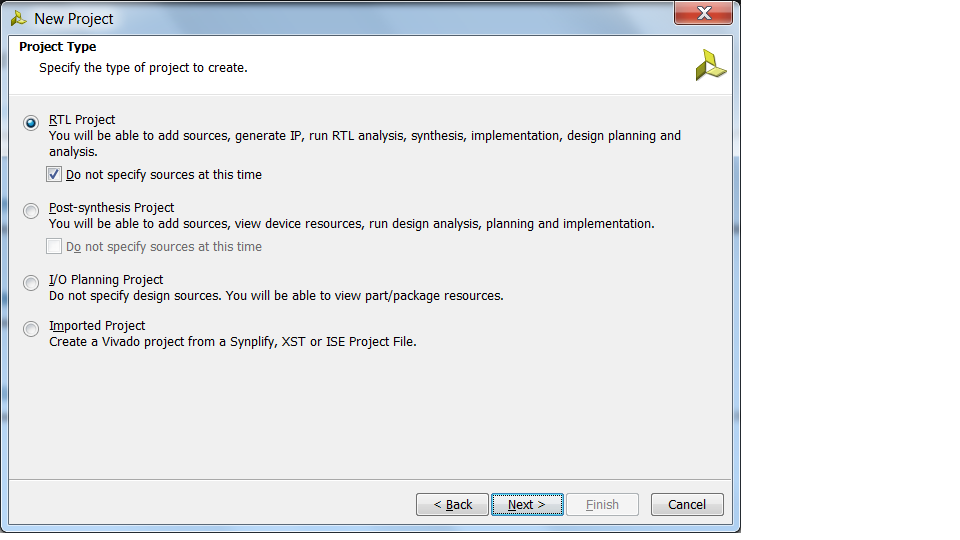
- Select RTL project without specifying source files at the moment as below snapshot shows
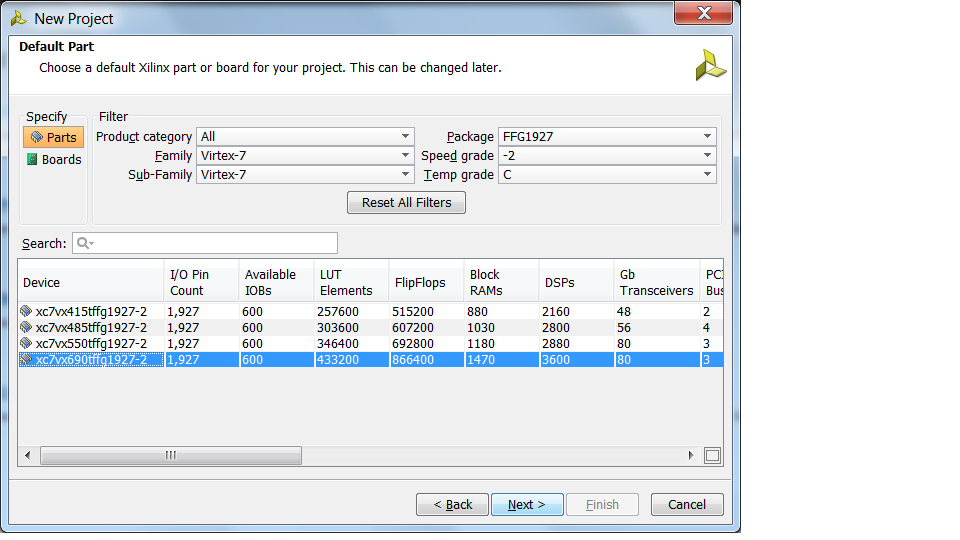
57260_1.pngb) Select the part that you want to target:
57260_2.png
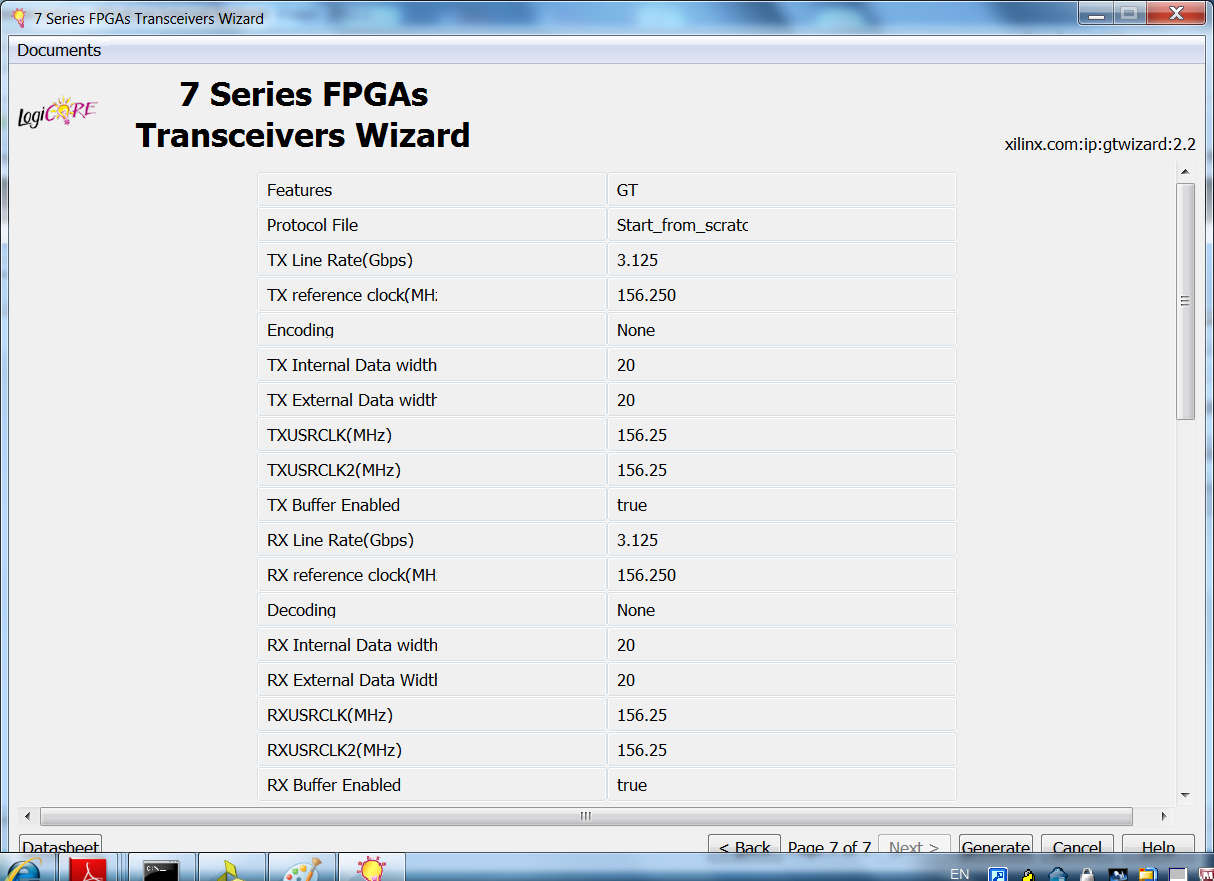
c) Generate transceiver IP using the wizard as explained in (Xilinx Answer 57259):
57260_5.png
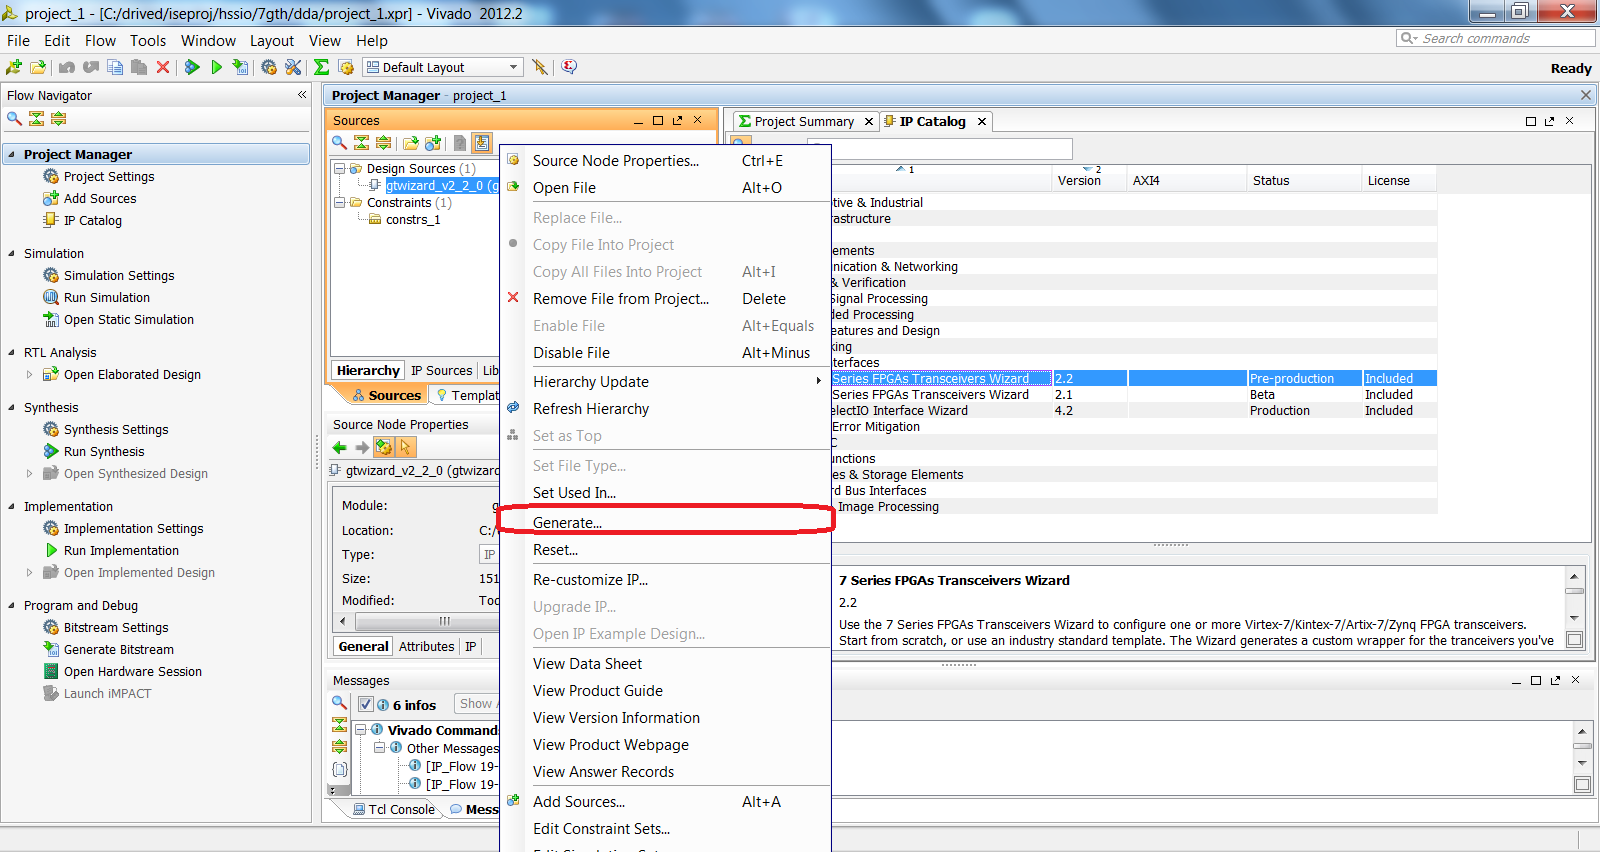
d) Right-click on the .xci file in the Sources window and select Generate...
57260_6.png
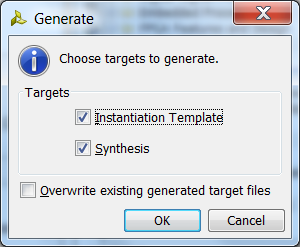
e) Check both "Instantiation Template" and "Synthesis" in the prompt:
57260_7.png
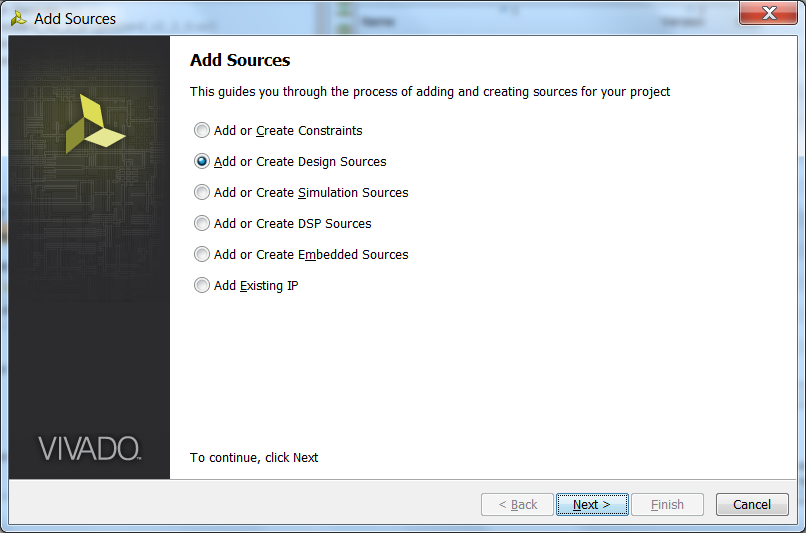
f) Press Alt+A to invoke the Adding Sources Wizard and select Add or Create Design Source:
57260_8.png
g) Add the 'example_design' folder and the necessary RTL files:
57260_10.png
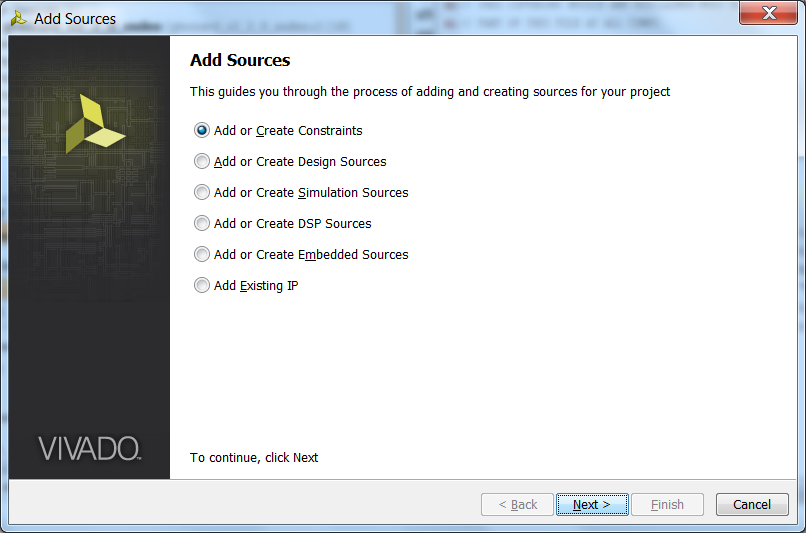
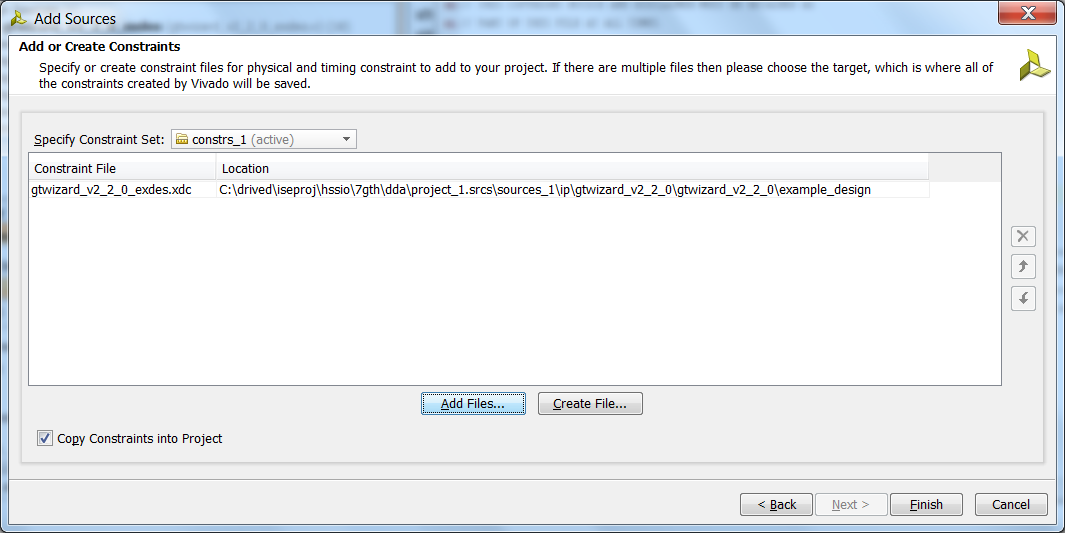
h) Press Alt+A again to add the constraints:
57260_11.png
57260_12.png
i) Double-click on the .xdc file and add LOC and IOSTANDARD constraints for all non-transceivers ports.
j) In Flow Navigator, click on Run Synthesis and Run Implementation one-by-one to finish the implementation process.
Design Implementation
1) Implementation in ISE:
a) Use the GT Wizard in Coregen to generate wrapper files as well as UCF constraints.
b) There are two .ucf files generated in the "example_design" folder. One is called <core_name>_top.ucf or <core_name>_exdes.ucf. The other is called gt_attribute.ucf.
-Commonly, gt_attribute.ucf is only used in a netlist design where the RTL GT wrappers are not available.
-In the cases where RTL GT wrappers are available, the gt_attribute.ucf can be ignored, so user don't need to add it into the design.
c) In the ISE project, create a wrapper for the <core_name>_top.v(hd) or <core_name>_exdes.v(hd).
d) Add all .v(hd) files to the ISE project.
e) Replace the frame_gen module with a user data generator, and replace the frame_check with a user data pattern receiver.
f) Implement the design by double clicking on the "Implement Design" command in the ISE GUI.
2) Implementation in Vivado:
a) Invoke the Vivado GUI.
b) Create a project by using the New Project Wizard in the same way as in the above example design flow.
c) Launch the GT Wizard from the IP Catalog in the same way as above and generate the source files - example design, GT wrappers, and .xdc file.
d) Add all source files to the project. The tools will identify the hierarchy automatically and identify the top module.
e) You can create a wrapper for that top module and add that wrapper to your design as a sub-module.
f) Replace the frame_gen module with a user data generator, and replace the frame_check with a user data pattern receiver.
g) Click on "Run Implementation" to start tool flow.
| AR# 57260 | |
|---|---|
| 日期 | 10/02/2013 |
| 状态 | Active |
| Type | 解决方案中心 |
