MicroZed Chronicles: Versal ACAP Part One
January 7, 2022
Editor’s Note: This content is republished from the MicroZed Chronicles, with permission from the author.
One of areas I started to explore last year, but never got chance to write more than a single blog on was Versal and the VMK180 development board. This year, lets kick things off with a refreshed look at Versal and the VMK180. Over the next few weeks and months, we are going to look at the architecture of Versal in depth, just like we have done for the Zynq SoC and Zynq MPSoC.
To get started with this miniseries, we are going to look at the architecture of the Versal Prime series VM1802 device on the VMK180.
Architecturally, the Versal device is comprised of the following elements:
- Processing system comprised of a Full Power Domain (FPD) which contains the dual-core Arm Cortex-A72 processors in the Application Processing Unit (APU). The Low Power Domain (LPD) contains the Real-time Processing Unit (RPU) with dual-core Arm Cortex-R5F processors.
- Platform Management Controller – This contains two TMR MicroBlaze instantiations and addresses that control the boot, configuration of the PL, and the overall platform.
- Cache Coherent Interconnect (CCIX) for Accelerators and PCIe (CPM) – As the primary PCIe interface for the PS, it also allows accelerators in the PL to connect to the CCIX and act as a CCIX accelerator.
- Network on Chip (NoC) – This provides device-wide network connection to the PL / AI Engines (on supported devices) and the DDR controllers.
- Programmable Logic – Programmable logic resources which also provide interfaces to the device interfacing options (e.g., 400G Crypto, 600G Ethernet etc.).
Similar to the Zynq SoC and Zynq MPSoC devices, there are dedicated MIO for the PS and PMC. We will look at how these are allocated in a different blog.
There are six power domains within the Versal device to enable us to optimize for power. Again, these domains can be controlled further using the PMC and will be explored in detail.
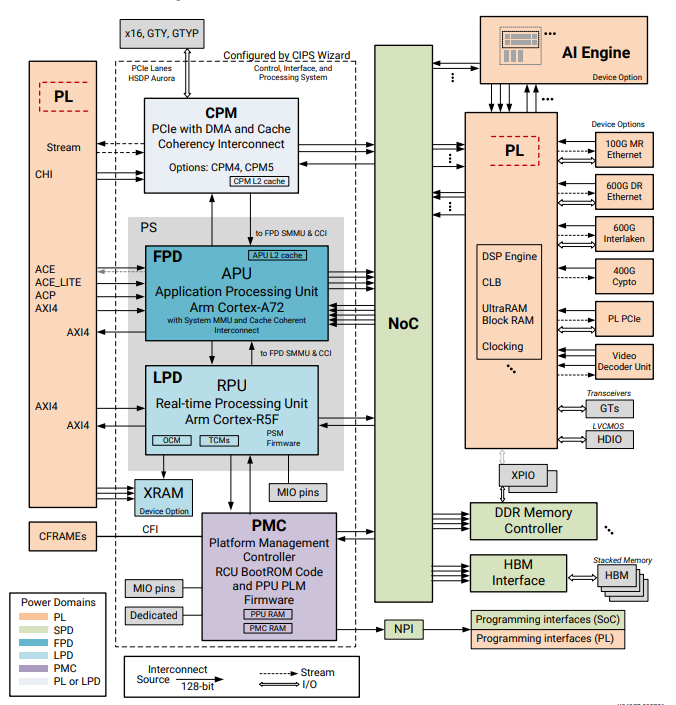
For the remainder of this blog, let’s look at how we can create a simple solution which allows us to say Hello World.
To do this, we need to instantiate the Control, Interface, and Processing System (CIPS) block within an IP Integrator block diagram. The CIPS block is where we can configure the PS / PMC and the CPM.
We can leverage Vivado’s board awareness to configure the CIPS system for the VMK180 board after we have downloaded the board definition using the Vivado Store before we create the project.
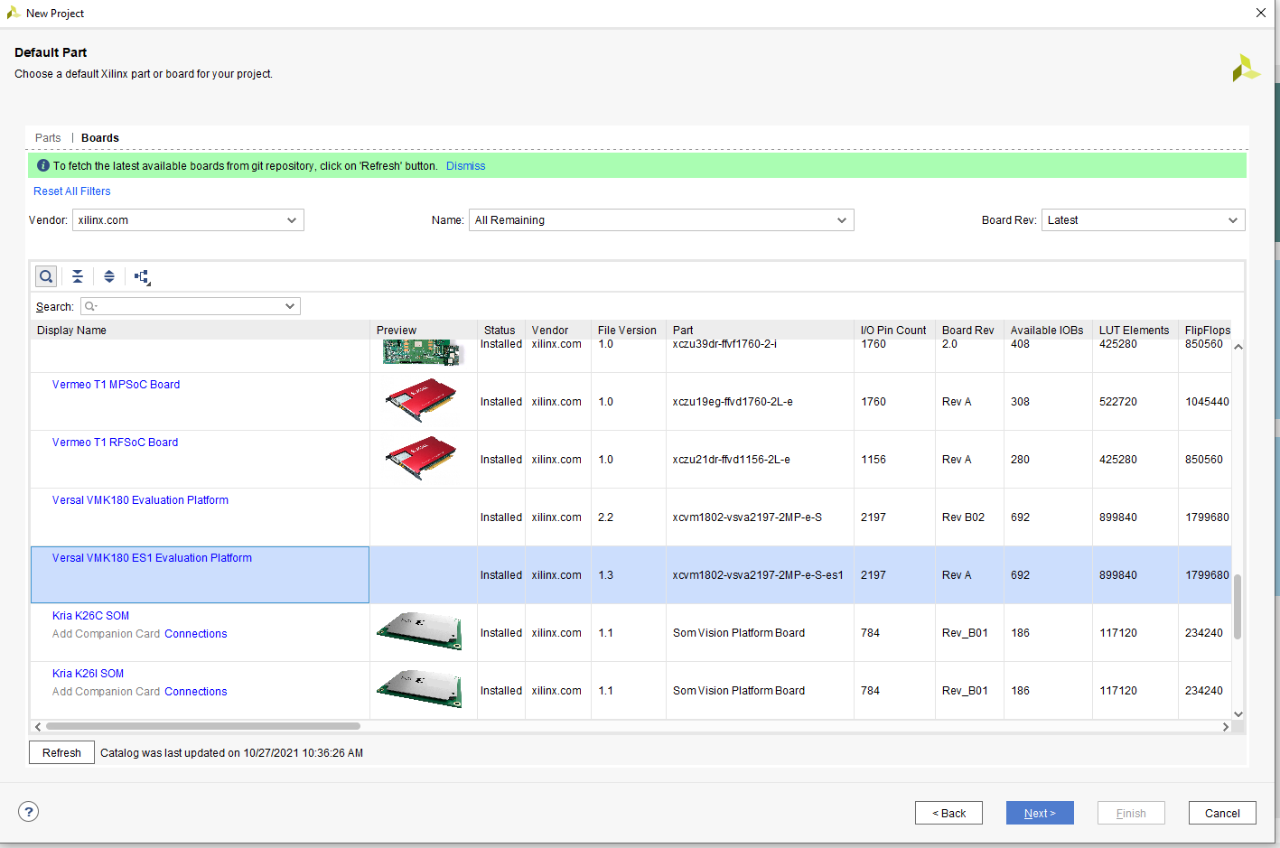
Once the project is created, the next step is to create a new block diagram in IP Integrator and add in the CIPS block to the diagram.
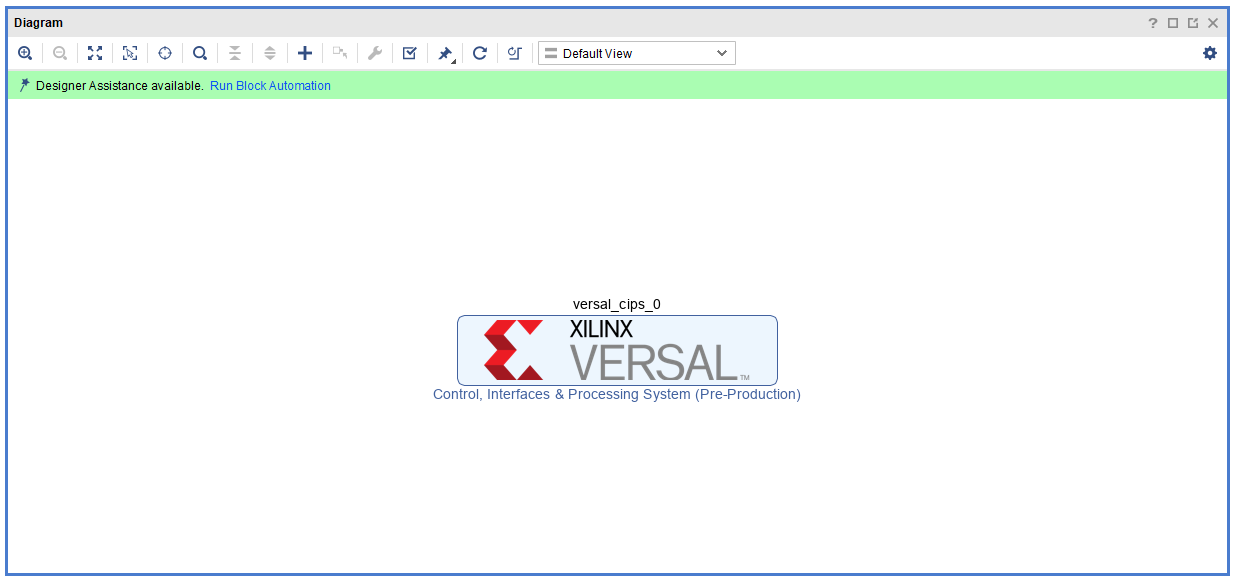
With the CIPS block added, the next stage is to run the Block Automation to configure the CIPS for the VMK180 board.
I set the block automation as follows:
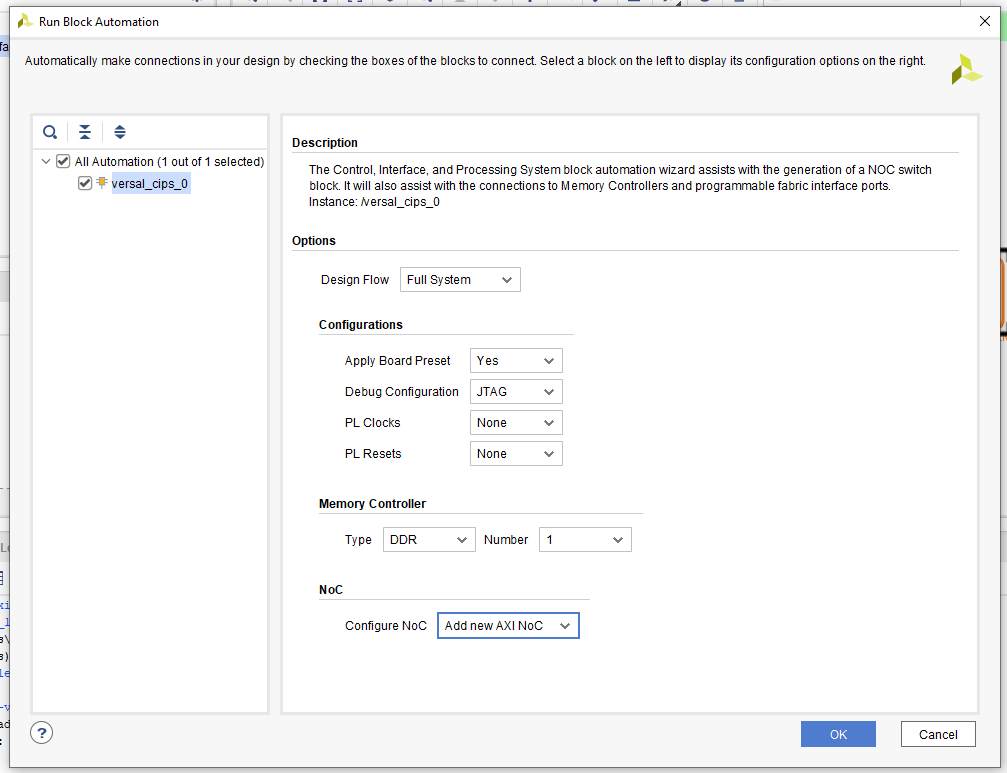
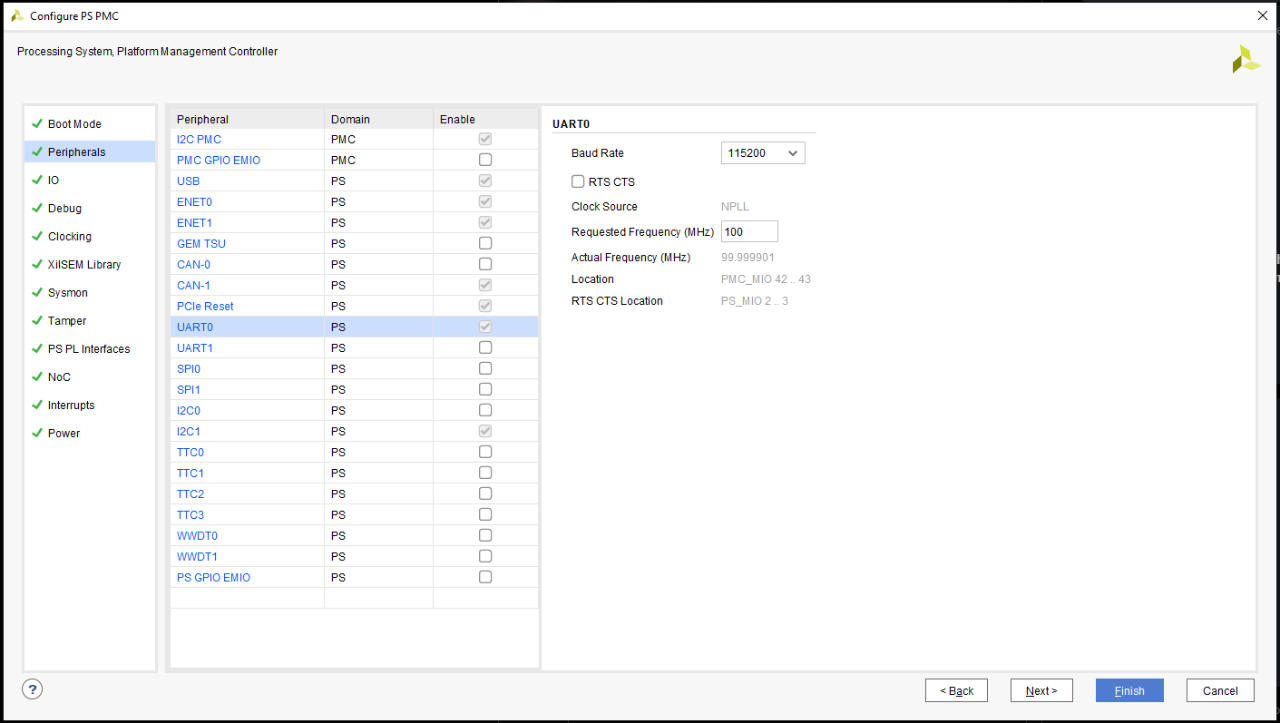
Once the block automation completes, we can double click on the updated CIPS block and explore the settings. In this module, you will see the ability to set several of the configuration features including boot mode, IO, peripherals, NoC and power.
Unlike with earlier SoCs such as the Zynq or Zynq MPSoC, the DDR controllers are not included as part of the processing system but instead, connected to the NoC. As a result, we need to add in the NoC and configure its DDR controller to be able to run our application from the DDR4 DIMM. The simplest way to do this is to use the boards tab in IP Integrator and to drag and drop the DDR4 DIMM1 onto the canvas.
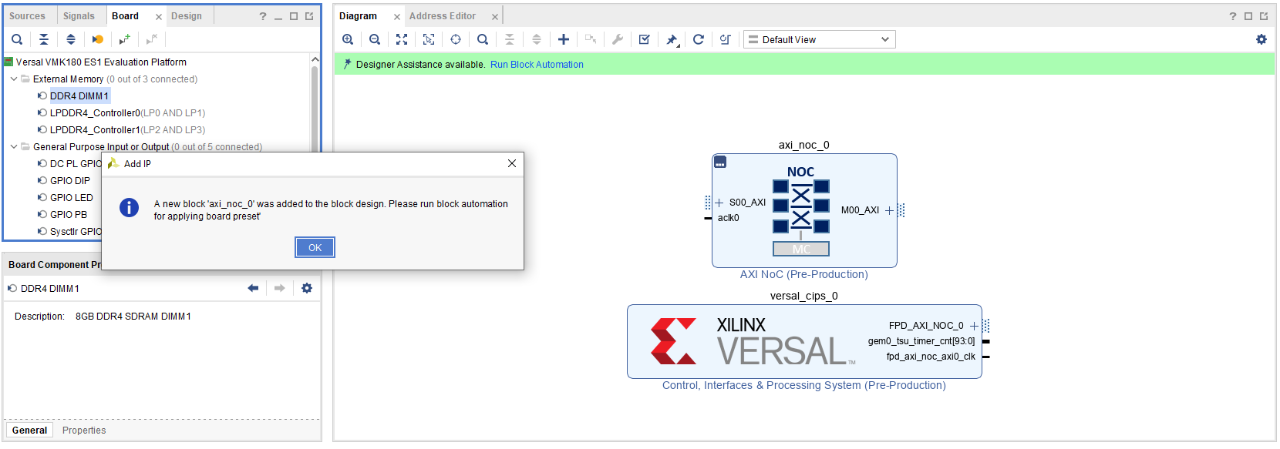
Running the block automation will result in the CIPS and the NoC being connected, along with the correct DDR4 configuration for the DDR4 DIMM.

Once this is completed, we can generate the HDL wrapper and create the device image which can be exported and used in Vitis to create the application software.
The software flow is identical to any other application development for this application. First we create the platform using exported XSA.

We can these use the Hello World template to create the application. When we download it, we will see the application run and be output on the terminal.

Now that we know the basic flow for the Versal device, we will look at more in-depth elements of the architecture in upcoming blogs.
Note, I implemented this using Vivado 2021.1. There is a known answer record of AR76668. I found I also had to update the Vitis HW server under Vitis/2021.1/bin/unwrapped as well as the Vivado patch to ensure the issue was addressed.
Xilinx Xclusive Blog
-
- 准备呐喊助威吧:赛灵思将参加 BattleBots电视系列角逐赛
- Dec 07, 2021
-
- 50 多家领先的公司、大学和研究机构将在 Xilinx Adapt 2021 上发言
- Sep 01, 2021
-
- 嵌入式 AI 需要什么样的解决方案
- Sep 01, 2021
Adaptable Advantage 博客
Xilinx AI 和软件博客
-
- 连获“双奖”,Xilinx AI 团队实力绽放国际视觉顶会
- Oct 08, 2021
-
- 您是否了解过赛灵思应用商店?评估和购买 Alveo 及 Kria SOM 解决方案的一站式商店。
- Sep 23, 2021
-
- Aupera Face Recognition Solution on Xilinx App Store
- Jun 20, 2021