MicroZed Chronicles: Kria, PYNQ, and Ubuntu Images
February 4, 2022
Editor’s Note: This content is republished from the MicroZed Chronicles, with permission from the author.
A few months ago, Xilinx released official Ubuntu images for the ZCU102, ZCU104, and ZCU106 evaluation kits certified by canonical and available from the official Ubuntu site. When we covered this in a previous MicroZed Chronicles, we interviewed Tony McDowell and Terry O’Neal who hinted that there would be a version for the Kria KV260 Vision AI Starter Kit which might include support for PYNQ as well.
This release is very exciting because it brings together several aspects that I think really open the capabilities of the Kria board and regular readers know I am huge fan of PYNQ. This release provides the developer with access to composable pipelines and the DPU-PYNQ.
To get started, we first need to download the Ubuntu image from the Ubuntu website and write it to a SD card.

Once you have the image written to a SD card, ensure you have an Ethernet connection and boot the Kria. The next step is to sign into Ubuntu using a serial terminal (115200:n:1).
Log in information is Ubuntu / Ubuntu and you will be asked to change the password as part of the sign on process.

Following the boot, you will see the IP address of the board and information on the status of the system processor.
Unlike with other PYNQ boards, the file system does not contain PYNQ. We need to install it instead. While this might sound daunting, it is quite straightforward. We simply need to clone the Kria PYNQ repository and run the installation script.
Cloning the repository can be achieved using the following command:
git clone https://github.com/Xilinx/Kria-PYNQ.git

Once this is achieved, we can enter the directory and run the install.sh script.
sudo bash install.sh

This might take several minutes to install.

Once installed, we will be able to log into Jupyter Notebooks just as we do with other PYNQ systems.

In a browser, navigate to the kria:9090/lab and log in with the password xilinx.

Once logged in, you will see the Juypter lab environment. The notebooks can be found several folders down the left handside of the screen.

These notebooks contain designs which include the following:
- Image processing with the Digilent Pcam 5C connected to the RPI port
- Composable video processing pipeline
- DPU accelerated machine learning at the edge
Of course, we still get the same capabilities that we have always been able to do in PYNQ to accelerate and prototype our designs.
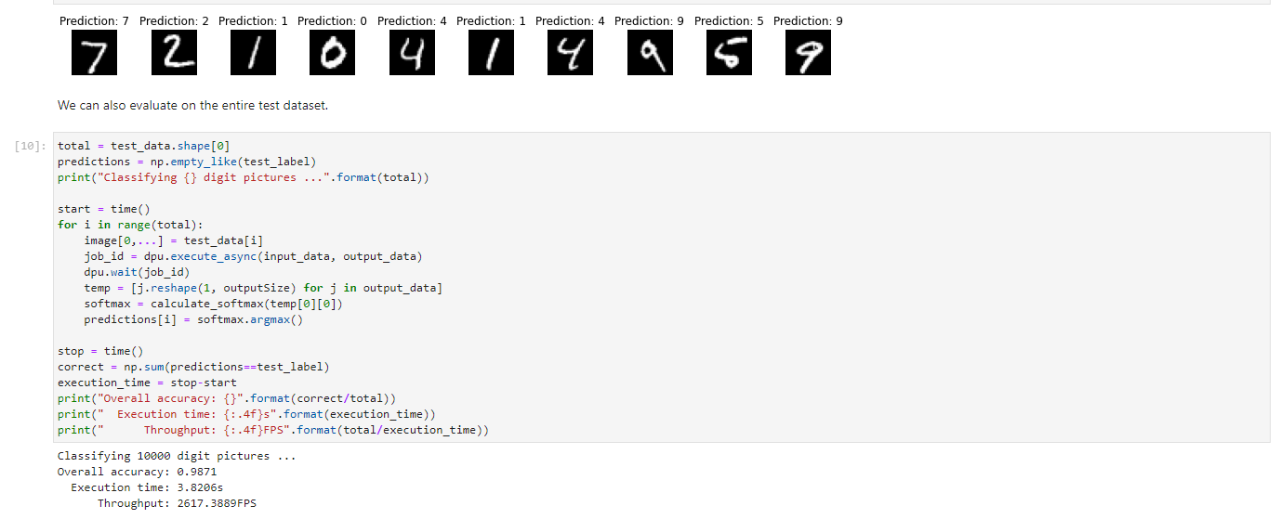
I ran the MNIST example to get started exploring the DPU algorithm. This show the throughput which is possible when the DPU is used.

I am looking forward to creating some Hackster projects using these new capabilities and features.
Xilinx Xclusive Blog
-
- 启动您的引擎:Versal Premium 系列引入 AI 引擎,“加速”信号处理
- Apr 20, 2022
-
- 基于自适应计算的尖端音视频与广播方案亮相 ISE 2022
- Apr 06, 2022
-
- 出货大吉!Versal HBM 系列现已出货
- Mar 29, 2022
Adaptable Advantage 博客
-
- MicroZed Chronicles: AXI Stream FIFO IP Core
- Apr 15, 2022
-
- MicroZed Chronicles: JTAG using a Raspberry Pi Pico
- Apr 08, 2022
-
- Zynq UltraScale+ ZU1 MPSoC:小巧、强大、现已上市
- Apr 06, 2022
Xilinx AI 和软件博客
-
- Vitis AI 2.0 现已推出!
- Jan 20, 2022
-
- 连获“双奖”,Xilinx AI 团队实力绽放国际视觉顶会
- Oct 08, 2021
-
- 您是否了解过赛灵思应用商店?评估和购买 Alveo 及 Kria SOM 解决方案的一站式商店。
- Sep 23, 2021